TLDR: Dealing with a toilet flapper that won’t seal is a common, yet fixable, bathroom annoyance. This post will guide you through the reasons and solutions for a non-sealing toilet flapper, ensuring your toilet functions properly.
The Mystery of the Malfunctioning Flapper
It’s a tale as old as modern plumbing: you flush, the water runs, and yet, the toilet flapper refuses to seal. This seemingly small issue can lead to water waste and increased utility bills. But what causes a toilet flapper to betray its sole purpose? Often, the culprit is simple wear and tear. Over time, flappers can harden and lose their flexibility, preventing a proper seal. Alternatively, if you’ve installed a new flapper and it’s not sealing, it might be due to an incompatible size or type for your toilet’s design.
Let’s dive into the depths of your toilet tank and unravel the enigma of a non-sealing flapper. With a bit of knowledge and some DIY spirit, you’ll be on your way to a fully functional flush in no time.
When the New Kid on the Block Won’t Fit In
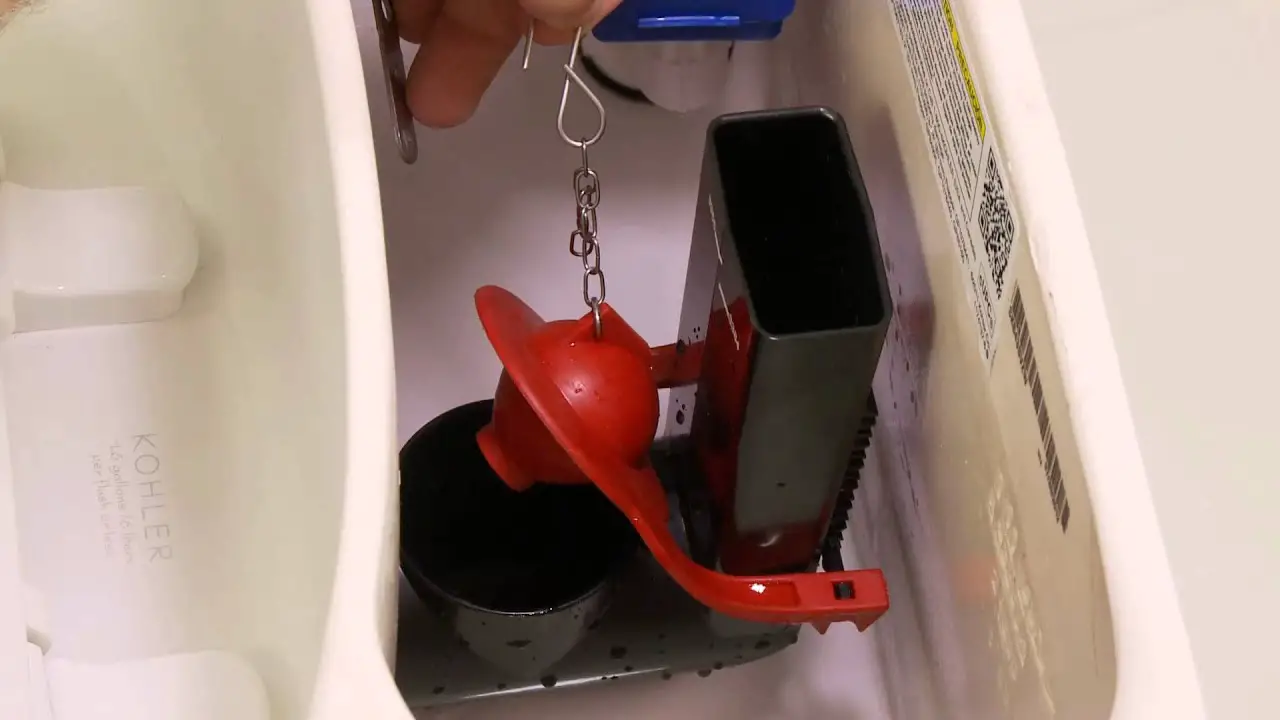
Installing a new toilet flapper seems straightforward, right? Yet, sometimes, the new flapper just won’t seal correctly. It’s like buying a new pair of shoes only to find they’re a size too small – frustrating and uncomfortable. The issue often lies in the installation process. Even a brand-new flapper can be rendered ineffective if not installed properly. Ensure that the flapper is compatible with your toilet model and that the chain length is adjusted so that it’s neither too tight nor too loose.
Remember, the flapper needs to descend squarely onto the valve seat. Any misalignment can cause leaks. It’s like a dance between two partners – if one is out of step, the whole performance is off. Check for any sediment or corrosion on the valve seat as well, as these can prevent a watertight seal.
Old Flapper, New Tricks: Reviving Your Seal
Perhaps your toilet flapper isn’t sealing properly because it’s been part of your bathroom ensemble for too long. Before you rush off to the hardware store, consider giving your old flapper some TLC. Sometimes, all it needs is a good cleaning to remove mineral build-up that’s preventing it from sealing. If it’s a case of hardening, a replacement is in order. When choosing a new flapper, opt for one made from flexible materials like silicone, which can resist deterioration better than traditional rubber.
An anecdote from a friend comes to mind: they had an ancient flapper that seemed to have taken on the role of a stubborn old gatekeeper, refusing to seal and let the water pass. A quick swap for a silicone-based flapper turned their bathroom saga into a success story. So, don’t underestimate the power of a simple upgrade!
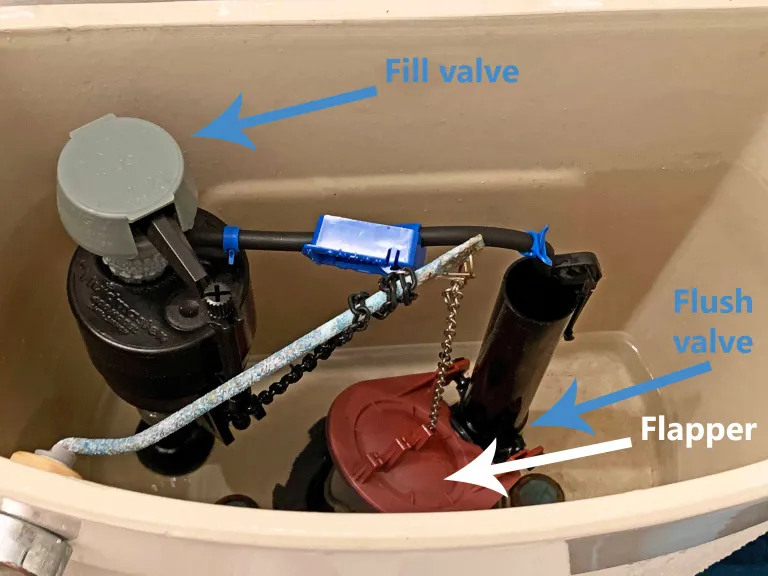
Seal the Deal: Ensuring a Leak-Free Flush
Now, let’s get down to the nitty-gritty. To ensure your toilet flapper seals properly, start by turning off the water supply and flushing the toilet to drain the tank. Inspect the flapper and the valve seat for any damage or wear. If you’re installing a new flapper, clean the valve seat thoroughly to ensure a smooth surface for the flapper to rest on.
Adjust the chain length so that the flapper can rise and fall freely. A chain that’s too short will prevent the flapper from fully seating, while one that’s too long can get caught under the flapper, causing leaks. Once everything is in place, turn the water back on and test the flush. If the flapper seals as it should, you’ll have the satisfaction of a job well done and the peace of mind that comes with a leak-free toilet.
Remember, your toilet’s flapper is the unsung hero of your bathroom. It’s a simple device, but it holds the key to water conservation and the efficient operation of your toilet. Treat it well, and it will return the favor.